
You know I've been obsessed with all things mason jar for a long time. I've used them to light the backyard and for drinking iced coffee, and now, I've finally turned them into a light fixture for the arbor! I recently held a birthday party in the garden, which provided the perfect excuse to complete a DIY lighting project I had seen here and here. It's a fairly simple project, unlike the electrically wired mason jar chandelier I had hoped to make for the dining room (and decided against in favor of a happy marriage. :) ). You can do it in a day, so give it a try!
You will need:
One 1" x 6' piece of pine a drill a jigsaw a compass 4 pint sized mason jars with lids jute rope acrylic caulk 4 votive candles (I used large tealights from IKEA) 2 hooks for hanging
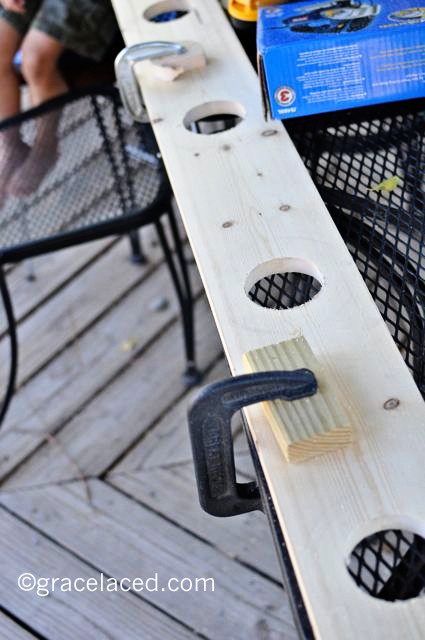
Start by cutting your pine to the length you would like your overall chandelier. Space the mason jars out evenly, and mark the center point where each jar will be place. You can trace the lid, but we chose to use a compass to measure and draw the circumference of the smaller side of the tapered lid. Drill a hole at the center point, then cut along the circumference with your jigsaw. Keep in mind the curf of your blade. (Test on scrap metal if needed...you want your ring of your lid to fit in the hole you cut!)
Mason Jar Chandelier
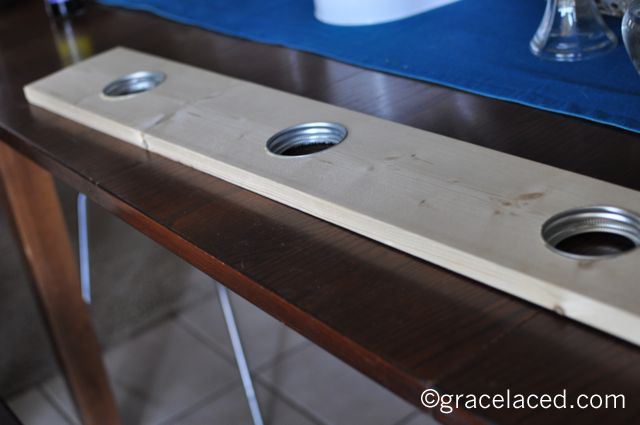
Apply a small bead of acrylic caulk around the outer edge of the lid, and press into the prepared openings. Clean excess with a dry rag. Let dry according to caulk instructions on tube. It should be ready in a few hours.
 Mason Jar Chandelier
Drill a hole (the same diameter as the rope you are using) at each of the corners.
 Mason Jar Chandelier
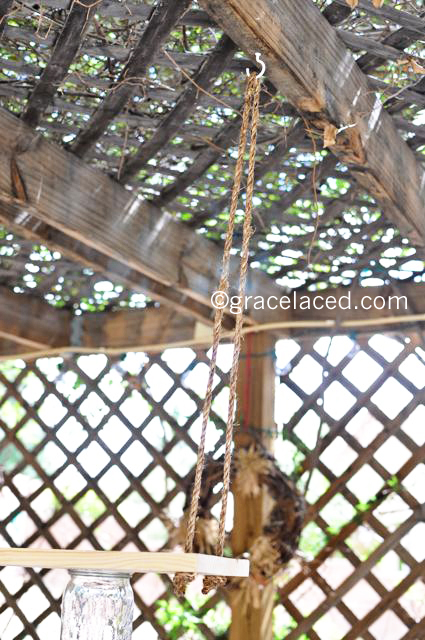
Measure the distance you want your chandelier to hang, double the length and add about 6 inches. Cut two lengths of that measurement. Thread each end each length of rope through the pair of holes on the ends of the chandelier. Knot the ends securely underneath the board (on the side with the lid opening of course...) Install hooks for hanging...
Mason Jar Chandelier
...and attach your mason jars. It helps to have your candles already placed inside!
 Mason Jar Chandelier
Light from above openings...

Mason Jar Chandelier
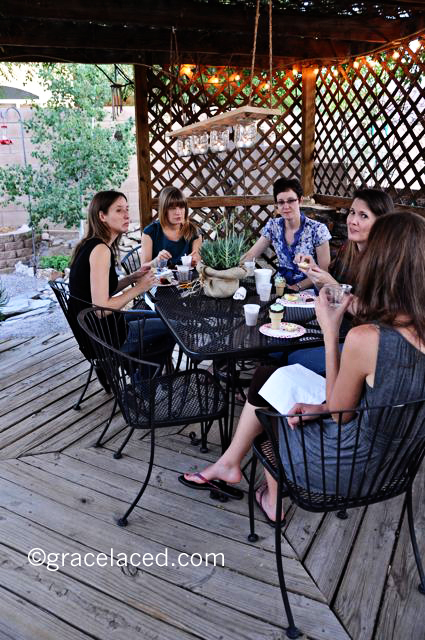
...and enjoy the ambience and glow!
Mason Jar Chandelier
I'm so blessed that you're here! I invite you to subscribe to GraceLaced!