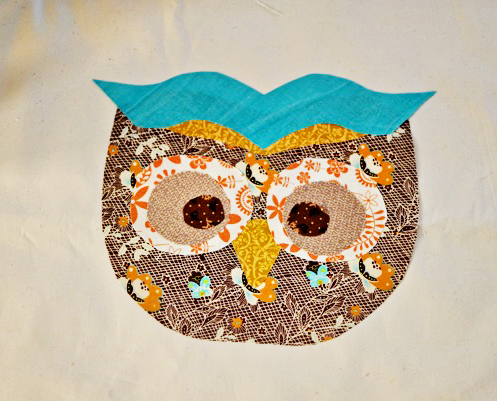
I shared last week about our last-minute plan for a nursery redo, or should I say: decide-to-do. I got to work this past weekend while The Preacher was out, and put together a simple baby blanket and pillow for color and decor inspiration. You have to start with something inspiring, and with no bedding quite to my liking anywhere, I decided to make my own. When there's a will, there is a way, I suppose, because I've all but called it quits on any more sewing and crafting projects!
Because I allowed myself but one weekend to complete this project, I knew it needed to be done fast and efficiently. 6 hours, and $20 later, I now have a baby quilt and decorative pillow for Cinco.
I employed the help of Heat'n Bond Ultra Hold Iron-On Adhesive. What.A.Lifesaver.
Let me introduce you if you haven't met already:
All you need is an iron!
Once adhesive is ironed-on, cut fabric into desired appliqued shapes.
You can pre-plan with a drawing, or freehand it like I did. I live on the edge.
I used a natural colored muslin as my backing. Cheap and functional.
Because I used the iron-on adhesive, and do not plan to use/wash this baby blanket very much, I did a wider zig zag, as opposed to the tight satin stitch for applique. That, and I just didn't have that much time!
I had a lot of fabric left over, so a decorative pillow was in order...
to go with the baby blanket.
Surprisingly simple, don't you think? Think of all the crafting uses for this no-sew adhesive! My mind is swarming with the many other projects I can complete with the remaining fabric pieces!
*I won't go into the whole process of finishing the quilt, but I ended up safety pinning all layers together, and stitching together by outlining the appliqued images with a straight stitch. I purchase orange bias tape for binding. The pillow I finished with orange piping around the edges. More photos to come when I do the nursery "reveal!"


